


Principles of Phase 2: Introduce Subject
The introduction phase intends to motivate students for the subject as well as aims to inventorize their prior knowledge. In a number of steps, the teacher can guide the students to recall, capture, exchange, organize, and structure their prior knowledge.
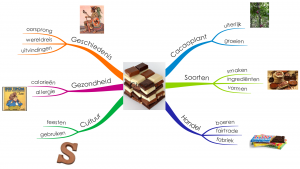
A number of options are imbedded in the scenario, that have proven their added val-ue in practice. For example, after the first exchange of prior knowledge in step 3, teachers can ask students to capture their own knowledge in a mind map. After step 5, the teacher can support the students in identifying core concepts by comparing the students’ core concepts with those from the teacher mind map. After step 7, when the classroom mindmap has been created, there are opportunities to explore this col-lective knowledge with the students.
Almost every activity in this phase can executed more or less learner-driven, depend-ing on the target audience and teacher’s preference.
Steps of Phase 2
Activate prior knowledge
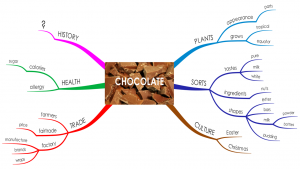
Appealing introduction to the subject
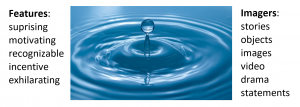
The purpose of the introduction is to enhance the inquisitive stance of students and to activate their prior knowledge about the core concepts.
Selected imagers should be aligned to the key aspects of core concepts and evoke students’ curiosity about them.
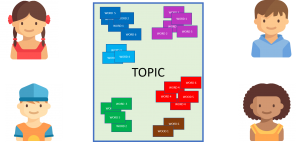
Note prior knowledge

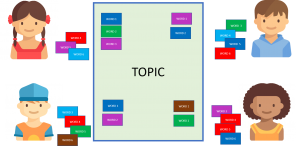
Students note their personal prior knowledge On each post-it: one concept No discussion or exchange yet
By allowing students to note their associations, each child gets the opportunity to think about his or her personal prior knowledge.
By listing each association on a single post-it, they can easily be moved and ordered later.
Exchange prior knowledge
Students exchange post-its one by one Explain how they associate these concepts to the subject
Students will now introduce their post-its one by one, and tell each other what each concept has to do with the subject. Other students may ask questions.
If other students have the same concept, they may add their post-its, but they also must explain their own association with this concept (which may be different!).
In the (group) conversation, each contribution is welcome, provided that students can explain how their post-it fits the subject. Because pupils exchange their ideas, passive foreknowledge may be activated: "Oh, yes, I know that too".
Test individual prior knowledge
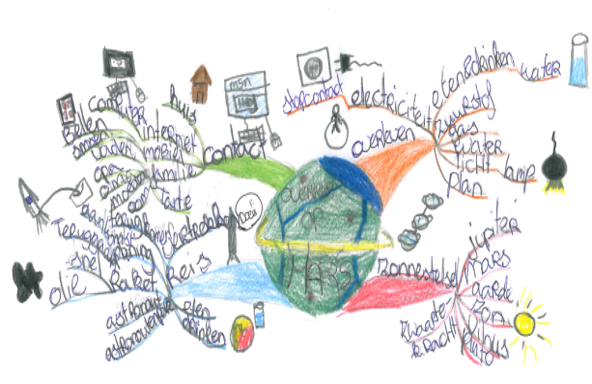
Students construct mind map to visualize prior knowledge
Students might construct an individual mind map as a pre-test to
- make individual pre- knowledge visible
- explore possible topics for questioning
- assess possible learning outcomes afterwards
Cluster
Students cluster their concepts
Students will often cluster concepts spontaneously in the exchange phase. If not, encourage students to cluster their concepts and let them explain to each other why and how these concepts are related.
Identify key concepts
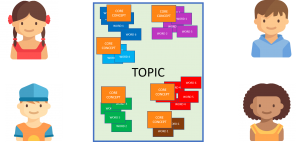
Students label clusters with key concepts
Once the clusters are formed, the next step is to find appropriate names for these clusters. Thus, students are challenged to identify (some of the) core concepts of the subject.
Sometimes one of the words in the cluster is suitable as a core concept. Sometimes another concept needs be found, that gives an appropriate name to the cluster.
Compare key concepts to teacher’s mind map

Students compare their key concepts to those of the teacher
In the previous step, the small groups can come up with all kinds of names for clus-ters. When aiming to construct one collective classroom mind map, this diversity in terminology might prove to be difficult.
In order to provide a structure that leads to one collective class mind map, you can instruct students to compare their suggested core concepts to the core concepts of the teacher mind map.
Transform clusters into branches
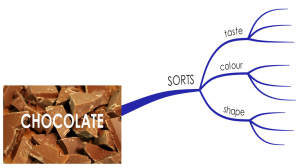
Structure the concepts from the clusters hierarchically One concept on each branch Organic shapes for efficient lay-out
The clusters are the raw material for forming mindmap branches.
In a mind map, clusters of concepts are hierarchically structured into core concepts on the main branches, sub concepts on sub branches, and details or examples on the sub-sub branches.
By using only one word for each branch, you encourage your students to think about the levels in the conceptual frame work of the subject.
Merge branches into a mind map
Together all branches form the classroom mind map
This classroom mind map becomes the guidebook to the educational theme and the conceptual framework to which students will link their questioning.
The classroom mind map can be constructed on paper (large = A0) or on the comput-er. The digital mind map is easy to supplement and customize. The paper mind map is always visible in the classroom, but is more difficult to adapt and its construction is time-consuming.
Orientation on collective prior knowledge
Students explore meaning of concepts in the classroom mind map
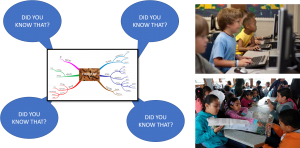
The classroom mind map represents the collective prior knowledge of all students, therefore not all the concepts will be known to each student.
Therefore, you could first encourage students to explore the concepts, from the class-room mind map, in various sources: books, computers, atlases, dictionaries, etc. Stu-dents can then add striking facts or descriptions as notes to the classroom mind map: "Did you know that ......?"